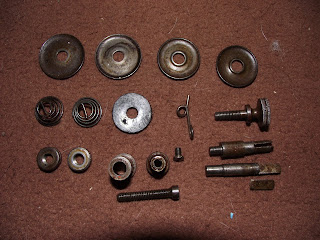
I started to dismantle this machine beginning at the top with the tallow tray and working in a logical sequence down the machine. Attention to detail with a camera is the secret to a good re-assembly and bagging the parts in their respective groups. This leaves you with manageable sized workloads.
I find it’s very important that you keep all parts even if some are broken as this will aid replacing them with old stock parts or when fabricating new ones. I like to ensure that my workload bags are relevant parts and that there isn’t too much in each bag.
After stripping all the parts of I was left with the shell of the machine. Now this was a challenge because its 100 year old cast iron and paint work can hide a multitude of sins. I used a compressed air sprocket gun with a screwdriver attachment to remove the retaining screws out of the base CAUTION BE VERY CAREFUL cast iron is very brittle. Once the shell was apart I photographed the decals recorded their measurements then stripped the metal bear.
I have deliberately scratched up the metal to give the undercoat a good surface to stick to. The scratches don’t have to be very deep but sufficient enough for the job.
I am using black Hammerite (brush painted on) as my undercoat because of its strength. I apply a coat leave it over night then sand the next day and repeat this process four times. What you end up with is a very hard layer of paint. The properties are excellent as this is an outdoor brand.
I got on with cleaning up the retaining screws as these have clearly had a hard life.
Once this was complete I re-attached the two base pieces.
You can see fourth layer of Hammerite paint before sanding.
More coming soon!


hello
ReplyDeleteI also restores 29K31 and I have a few practice question you can write me I give you my email "taikokanou@gmail.com"
I am to see you with pictures of my machine.
Thank you very much for your help.
Best regards,
Fabien.